AR 2765 (Lower left side)
Friday, 5 June 2020
You Never Forget Your First Sunspot
Wow! I've just taken my first ever photo of a sunspot! Thanks to Anthony Wallace Cross from the Manchester Astronomical Society for the heads up.
Saturday, 16 May 2020
Sunday, 10 May 2020
*** Warning - A Work in Progress ****
Everything in this blog is still a work in progress as I try to backtrack to last Autumn when I started to take my journey into Astrophotography and Astronomy more seriously. I'll be backdating some of the posts so that they appear in the correct chronological order and sequence.
The aim of this blog is to put some more detailed information about what I do and how I do it as I climb the steep learning curve that us astrophotography. Hope fully some of the information here will be useful to others as they start their journey too. I'll be including links to other internet-based resources which I've found useful or interesting.
So please bear with me whilst I write the posts and upload the photos and I'll remove this message once the site is fit to be viewed :) Once that is done it will be updated as I do each new set of shots.
Thanks for reading.
Martyn (GeekTeacher Astro)
The aim of this blog is to put some more detailed information about what I do and how I do it as I climb the steep learning curve that us astrophotography. Hope fully some of the information here will be useful to others as they start their journey too. I'll be including links to other internet-based resources which I've found useful or interesting.
So please bear with me whilst I write the posts and upload the photos and I'll remove this message once the site is fit to be viewed :) Once that is done it will be updated as I do each new set of shots.
Thanks for reading.
Martyn (GeekTeacher Astro)
Shooting For The Moon
Recently I've had a few people asking about the camera settings for photographing the moon in a single shot. As cameras have different features, I can only tell you what I use and what works for me on my Nikon D500 DSLR, but it will give you something to aim at - here goes:
Hope that helps.
- Use a tripod if at all possible
- Use a shutter release cable if possible, if not use the self-timer set to at least 3 seconds
- Also set the shutter delay to 3 seconds if possible
- Put the camera in full manual mode
- Turn off autofocus and image stabilisation on the lens
- Choose single point or centre-weighted metering
- Set the ISO to 100
- Set the aperture to f/11 (Looney 11 rule)
- Use 'Live View' on the back of the camera to zoom in on a crater or the edge of the moon to get the best focus position
- Focus manually by turning the lens focus ring back and forth until the image is sharp
- Adjust the shutter speed until the exposure looks right starting at about 1/125th second
- Press the shutter release button to take the shot.
Hope that helps.
Tuesday, 5 May 2020
Waxing Gibbous Moon, Again! (4/5/20)
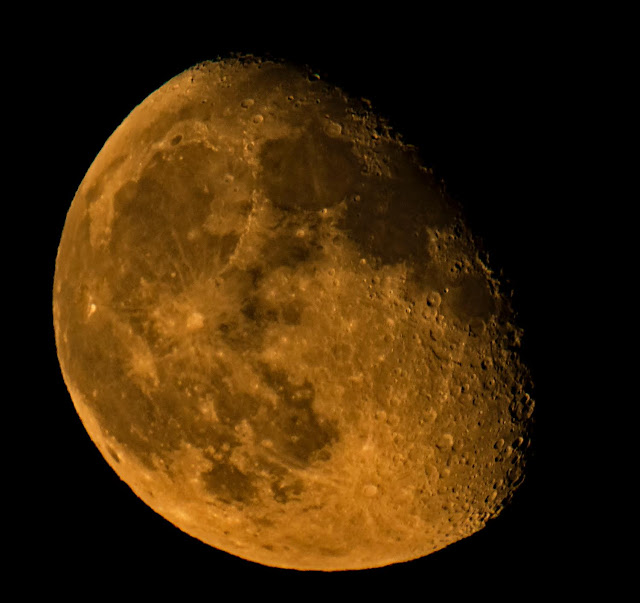
Here's a shot of last night's waxing gibbous moon, but with a difference. I've tried using PIPP to convert a short video of the moon into separate TIF files which can then be stacked in AutoStakkert3, but without much success. I seem to get much better results from single shots only processed in Photoshop. This image is a stack of eight separate shots blended together using only Photoshop. However I must admit that this one looks a tad sharper than the single shot shown below it, although it has gained a bit of a purple tinge, which I can remove if necessary.
Below is just one of the single shots used to make the above image:
The stacking process I used in Photoshop was as follows:
Below is just one of the single shots used to make the above image:
The stacking process I used in Photoshop was as follows:
- Choose File>Scripts>Load Files into Stack
- Click Browse and select all the files you want to stack together
- Tick the 'Attempt to Automatically Align Source Images' checkbox and then OK
- Then in Photoshop, select all the layers
- Choose the 'Lighten' blend mode.
- Process further if required and then save.
Sunday, 3 May 2020
Craters on the Moon
Today I used Wikipedia to compile a list of crater photos in order to learn some more of their names.
Saturday, 2 May 2020
A Closer View
Last night was a bit of an experiment. I had planned to do some Deep Sky imaging (galaxies, nebulae and star clusters) but because the clouds rolled in, I ended up only doing a few moon shots. I wanted to try using my QHY5P-IIC guide scope camera on my Skywatcher 200P telescope for getting some closer views of the moon. This camera also has a use as a planetary camera. I got all this stuff in a secondhand bundle with my mount last October and haven't used it until now. Little did I know how difficult it was going to be.
First of all I didn't bother with tracking as I couldn't see Polaris to do my polar alignment. Instead I just moved my equatorial (tracking) mount manually as a tripod. At such high magnifications it was so hard to even find the moon as I wasn't sure about where the focus was or even if I had the right number of extension tubes necessary to be able to focus this camera on my telescope.
I captured these images in SharpCap which also has to be used to focus the camera as, a bit like a webcam, it has no screen. Focusing caused the scope to wobble and so I had to turn the wheel a bit and then wait while it settled before making another small adjustment - very hit and miss.
But in the end I managed to get these two videos of the moon moving past my scope. Focusing probably could have been sharper and I didn't bother to alter any image quality or colour settings in SharpCap, which is something I'll look into next time.
First of all I didn't bother with tracking as I couldn't see Polaris to do my polar alignment. Instead I just moved my equatorial (tracking) mount manually as a tripod. At such high magnifications it was so hard to even find the moon as I wasn't sure about where the focus was or even if I had the right number of extension tubes necessary to be able to focus this camera on my telescope.
I captured these images in SharpCap which also has to be used to focus the camera as, a bit like a webcam, it has no screen. Focusing caused the scope to wobble and so I had to turn the wheel a bit and then wait while it settled before making another small adjustment - very hit and miss.
But in the end I managed to get these two videos of the moon moving past my scope. Focusing probably could have been sharper and I didn't bother to alter any image quality or colour settings in SharpCap, which is something I'll look into next time.
Y.A.M.S.
Y.A.M.S. stands for Yet Another Moon Shot. I often take shots of the moon when other plans have gone by the wayside. It's always a good fallback. Tonight I had planned to do a full evening of Deep Sky Object (DSO) shots because this afternoon the weather looked to be set fair for a while. But things don't always go to plan, do they?
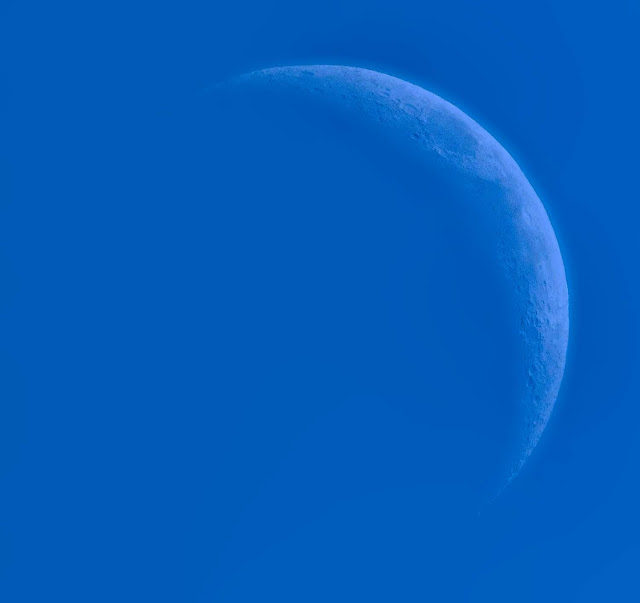
The moon appeared early in the afternoon as a very faint object in the sunny blue sky, so I really had to ramp up the contrast and brightness to get anything worth looking at. I suspect you will either love or hate this image of the daytime moon.
After it had gone dark I started taking a few shots with my big telescope (which I am still getting used to) and the guide camera which can also be used as a planetary camera. I was pleased to have some success with this as the guide camera produces much closer images than my normal cameras do. I waited for Polaris to appear out of the clouds that had rolled in so that I could polar align my mount and get on with tonight's main business.
I waited, and waited and ... waited, but the clouds didn't lift. So I just kept taking a few more moon shots in the hope that it would lift eventually. By 11pm it had got colder and damper and there was dew beginning to form on the grass, so I decided that would be it for the night. Of course, after I had packed everything away, the sky started to clear again, but by then I'd had enough and I decided that I just process what I'd got and call it a night. Here's the first of them and more will follow tomorrow.
The moon appeared early in the afternoon as a very faint object in the sunny blue sky, so I really had to ramp up the contrast and brightness to get anything worth looking at. I suspect you will either love or hate this image of the daytime moon.
| Afternoon Moon (2/5/20) |
I waited, and waited and ... waited, but the clouds didn't lift. So I just kept taking a few more moon shots in the hope that it would lift eventually. By 11pm it had got colder and damper and there was dew beginning to form on the grass, so I decided that would be it for the night. Of course, after I had packed everything away, the sky started to clear again, but by then I'd had enough and I decided that I just process what I'd got and call it a night. Here's the first of them and more will follow tomorrow.
| Waxing Gibbous Moon (2/5/20) |
Friday, 1 May 2020
Tonight's Moon (1/5/20)
Tonight's waxing gibbous moon with various processing methods applied. Can you see any real difference - which do you prefer?
I wondered that if I cropped the shots into two halves, would the detail be clearer in each section?
I also thought it might be a good idea to dig out this old moon map I made a few months ago:
What is a Light-Year?
The distances to our nearest stars, galaxies and nebulae are huge - astronomical even! If we used our normal units of measurement such as kilometres or miles, the number of digits would be huge too. So to make the numbers easier to handle, the concept of the light-year is used.
In 1838, the German astronomer Friedrich Wilhelm Bessel was the first to use the light-year as a unit of measurement in astronomy. He measured the distance to the binary star 61 Cygni as 10.3 light-years.
The light-year is not a unit of time although it sounds like it might be - it's a unit of length or distance, just like kilometres and miles. As defined by the International Astronomical Union, a light-year is:
The light-year measures about 9.46 trillion kilometres or 5.88 trillion miles. If these numbers were written using our normal units of length, that would be 946,000,000,000,000 kilometres or 588,000,000,000,000 miles.'the distance that light travels in a vacuum in one year'
I think you can see now why we use light-years rather than kilometres or miles! But even though the term is still very much in use, another larger unit the parsec (which is equal to 3.26 light-years) is actually much more popular in the scientific community.
Here are some approximate distances to some of the better-known night sky objects:
Deep Sky Objects:
Deep Sky Objects:
- Andromeda Galaxy - 2.537 million light-years
- Orion Nebula - 1,344 light-years
- Betelgeuse - 642.5 light-years
- Polaris - 433 light-years
- Capella - 42.92 light-years
- Arcturus - 36.66 light-years
- Vega - 25.05 light-years
- Sirius - 8.61 light-years
Our Solar System:
- Sun - 150 million kilometres (93,000,000 miles)
- Mercury - 77 million kilometres (48 million miles )
- Venus - 40 million kilometres (25 million miles)
- Moon - 384,400 km (238,900 miles)
- Mars - 225 million kilometres (140 million miles)
- Jupiter - 778 million kilometres (484 million miles)
- Saturn - 1.44 billion km (894 million miles) Uranus - 2.75 billion km (1.71 billion miles)
- Neptune - 4.5 billion kilometres (2.8 billion miles)
Wednesday, 29 April 2020
Tonight's Moon - 29/4/20
Tonight's single shot of the moon (29/4/20). I've decided that most of my previous moonshots have been taken using the wrong white balance. I can reprocess them to correct this, but I don't think I'll bother - there'll be plenty more moons in the sky!
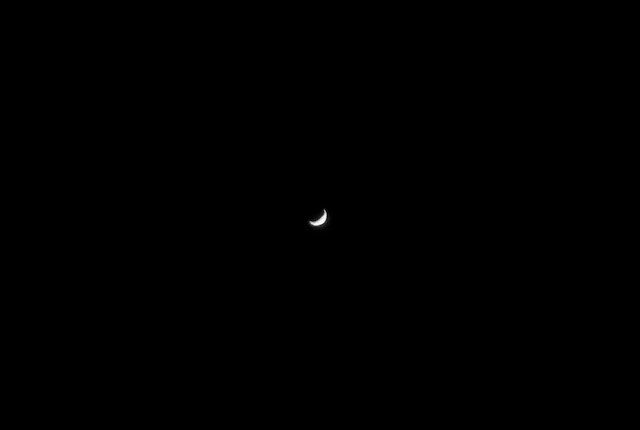
Venus is a lot harder to photograph my camera gear. It's very bright, very small and a long way away. Here's the best I can currently do. At least, being a crescent shape, it shows it has phases like the moon. Only Mercury, Venus and the Moon show full phases like this, because they are between the Earth and the Sun. Mars shows some partial phases I believe.
Getting Started With StarGazing
If you want to get started in StarGazing I'd recommend getting a pair of binoculars and a book such as the one in the Amazon link below. I'd say that you need to pay at least £50-£60 for a decent pair of binoculars as cheap ones often disappoint and may not be aligned correctly. Good budget brands include Opticron, Celestron, Hawke and Helios as well as the range supplied by the RSPB bird society which I think may be rebranded Viking products.
I'm not making any recommendations except to say have a look at the websites shown below and consider visiting Focal Point Optics in Cheshire who will let you try out various models, give you great advice and not put you under any pressure to buy.
- BBC Sky at Night Magazine https://www.skyatnightmagazine.com/reviews/binoculars/
- Focal Point Optics - https://www.focalpointopticsltd.com
- Book - https://www.amazon.co.uk/gp/product/000825771X…
MoonShot Collection
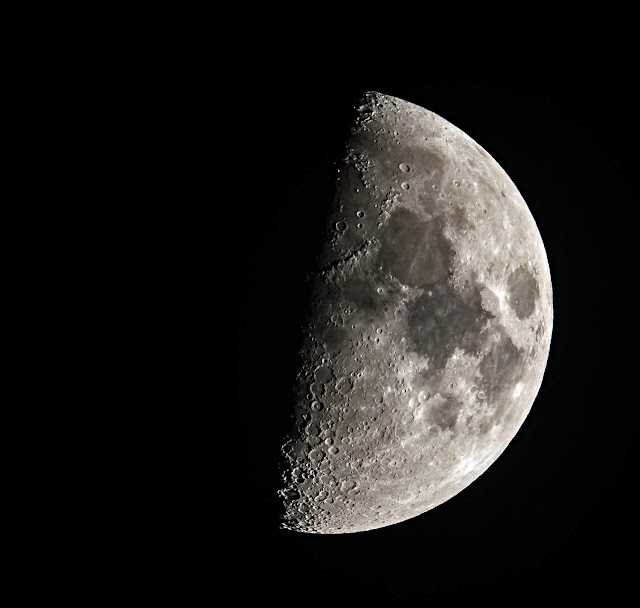
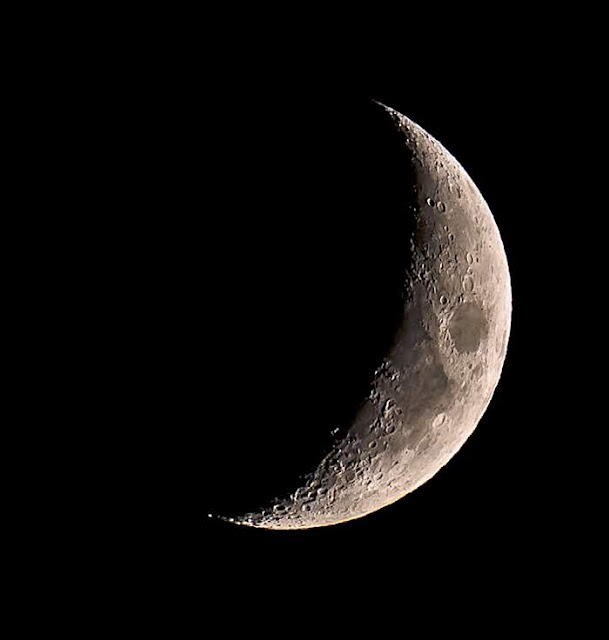
I just can't resist taking photographs of the Moon, even though I've got loads of shots already. There's just something about that big, bright object shining up in the night sky. However, the full moon doesn't make the best shots because the light is very flat. The craters and ridges need a bit of shadow to make them stand out and so partial phases usually produce the best photos.
Monday, 27 April 2020
Stellarium - Free Planetarium Sofware
Stellarium is an amazing free planetarium program which shows the sky realistically in 3D, just as you'd see it with the naked eye, binoculars or a telescope. It is completely free of charge as a download from www.Stellarium.org
Try it, it's completely free and although it takes a little getting used to, it's well worth the effort. There is also a simpler mobile phone app version too.
But Stellarium also contains a wealth of information about most things in the night sky. It names all the planets, constellations, galaxies and nebulae and shows you where they are in the sky on any given night. Many people use it to look at what can be seen from their location before they go out looking. You can also animate the stars both backwards and forwards in time to check out something you saw previously or to plan what you might see in the future
.
Don't be put off by it's complexity, you don't need to know much to be able to get some good use out of it. Start by putting in your location and the correct time and date. Use the mouse and arrow keys to move the sky around until it's pointing the way you are looking. The two menus are in the bottom left corner of the screen but to see them you need to move the mouse pointer over there and then they will appear. The one on the left side lets you set things up and search for something and the one on the bottom edge turn things on and off such as constellation lines, star and planet names etc.
Try it, it's completely free and although it takes a little getting used to, it's well worth the effort. There is also a simpler mobile phone app version too.
Sunday, 26 April 2020
DSLR Camera Settings for Astrophotography
Currently I only use a DSLR (Digital Single Lens Reflex) camera for astrophotography. There are other more specialist cameras that can be used, but these require a computer to control them and view their images. You can also use compact and bridge cameras as well as mobile 'phone cameras up to a point, but as I have no experience of any of these I cannot say anything about them. There are however, many websites, Facebook groups and forums specifically aimed at these other types of camera.
I'm also currently only using my camera lenses rather than a telescope to take astro shots, although I do have a telescope and intend to at least try it at sometime in the future. So this post is only about the camera settings which I use to get my shots with my prime and zoom lenses plus teleconverters.
The first thing to do is to make sure that the camera is set to take RAW images, rather than JPGs. RAW images store all the data captured by the camera's sensor, whereas JPGs lose some of it by compressing the image to make it smaller in file size (not image size). JPGs are mainly used to put photos on the internet or to share shots by email and social media, where file size usually matters more than quality. Some basic cameras and mobile phones only take JPG images.
The next thing is that your camera should be in fully manual mode. If your camera doesn't have a manual mode, you may have a 'night sky' setting that you can try. Manual mode means that you control the shutter speed, the aperture and the ISO rather than the camera. You should also turn off any vibration reduction technology your camera or lens has, such as VR or IS.
The camera always needs to be on a tripod or tracking mount and it's best to use an intervalometer, a remote shutter cable or at least some kind of exposure delay or self timer to avoid wobbling the camera by pressing the shutter button. The slightest movement will cause blur.
You need to learn how to use your camera and focus in the dark, so it's good to practice changing settings in the light! Your camera's LiveView screen should be turned on so that you can see the live image on the back of your camera rather than having to use the viewfinder which is very difficult in the dark. Zoom in to a star in LiveView and slowly roll the focus ring on the lens back and forth until the star eventually appears as just a small bright dot. It doesn't have to be the star you're shooting at as the focus will be pretty much the same for any distant object.
Exposure settings are largely a matter of trial and error as what what works for one person in one situation doesn't work somewhere else. However it is good to have some starting values to aim at. I mainly use the following ranges of settings, but I do also experiment with others from time to time. Please remember these are my settings for my camera and lenses - yours may be quite different.
Untracked and Unstacked Wide Shots - Constellations and the Milky Way
There is no magic wand, you just have to get out there and try it. Don't be disappointed if your first few nights produce nothing or little worth keeping, mine certainly did. Perseverance is key - don't give up.
I'm also currently only using my camera lenses rather than a telescope to take astro shots, although I do have a telescope and intend to at least try it at sometime in the future. So this post is only about the camera settings which I use to get my shots with my prime and zoom lenses plus teleconverters.
The first thing to do is to make sure that the camera is set to take RAW images, rather than JPGs. RAW images store all the data captured by the camera's sensor, whereas JPGs lose some of it by compressing the image to make it smaller in file size (not image size). JPGs are mainly used to put photos on the internet or to share shots by email and social media, where file size usually matters more than quality. Some basic cameras and mobile phones only take JPG images.
The next thing is that your camera should be in fully manual mode. If your camera doesn't have a manual mode, you may have a 'night sky' setting that you can try. Manual mode means that you control the shutter speed, the aperture and the ISO rather than the camera. You should also turn off any vibration reduction technology your camera or lens has, such as VR or IS.
The camera always needs to be on a tripod or tracking mount and it's best to use an intervalometer, a remote shutter cable or at least some kind of exposure delay or self timer to avoid wobbling the camera by pressing the shutter button. The slightest movement will cause blur.
You need to learn how to use your camera and focus in the dark, so it's good to practice changing settings in the light! Your camera's LiveView screen should be turned on so that you can see the live image on the back of your camera rather than having to use the viewfinder which is very difficult in the dark. Zoom in to a star in LiveView and slowly roll the focus ring on the lens back and forth until the star eventually appears as just a small bright dot. It doesn't have to be the star you're shooting at as the focus will be pretty much the same for any distant object.
Exposure settings are largely a matter of trial and error as what what works for one person in one situation doesn't work somewhere else. However it is good to have some starting values to aim at. I mainly use the following ranges of settings, but I do also experiment with others from time to time. Please remember these are my settings for my camera and lenses - yours may be quite different.
Untracked and Unstacked Wide Shots - Constellations and the Milky Way
- Lens: 14-24mm zoom and 24-70mm zoom
- ISO range: 1600-3200 : Aperture range: f/2.8-f/4 : Shutter speed: 10-30 seconds
- Number of shots: 1
- Lens: 500mm with 1.4x, 1.7x or 2x teleconverters
- ISO range: 800-1600 : Aperture range: f/8-f/11 : Shutter speed: 30, 60 or 90 seconds
- Number of shots: 20-30
- Lens: 500mm with 1.4x, 1.7x or 2x teleconverters
- ISO range: 100-200 : Aperture range: f8-f11 : Shutter speed: 1/80th -1/200th second
- Number of shots: 1
There is no magic wand, you just have to get out there and try it. Don't be disappointed if your first few nights produce nothing or little worth keeping, mine certainly did. Perseverance is key - don't give up.
Messier Objects and Numbers
So Who Was Charles Messier?
Charles Messier was a French astronomer who lived 1730-1817. He published an astronomical catalogue consisting of 110 galaxies, nebulae and faint star clusters, which came to be known as the Messier Objects. The purpose of the catalogue was to help astronomical observers distinguish between permanent and transient objects in the sky.
Messier did his observing with a 100 mm (four-inch) refracting telescope from HĂŽtel de Cluny (now the MusĂ©e national du Moyen Ăge), in Paris. The list he compiled only contains objects found in the area of the sky Messier could observe, from the north celestial pole to a declination of about −35.7° .
They are not organized scientifically by object type, or by location. The first version of Messier's catalogue contained 45 objects and was published in 1774 in the journal of the French Academy of Sciences in Paris. In addition to his own discoveries, this version included objects previously observed by other astronomers, with only 17 of the 45 objects being Messier's. By 1780 the catalog had increased to 80 objects.
The final version of the catalogue was published in 1781, in the 1784 issue of Connaissance des Temps. The final list of Messier objects had grown to 103 objects. On several occasions between 1921 and 1966, astronomers and historians discovered evidence of another seven objects that were observed either by Messier or by Méchain, shortly after the final version was published. These seven objects, M104 through M110, are accepted by astronomers as being "official" Messier Objects.
The Messier designations from M1 to M110, are still used by professional and amateur astronomers today and their relative brightness makes them popular objects in the amateur astronomical community.
The final version of the catalogue was published in 1781, in the 1784 issue of Connaissance des Temps. The final list of Messier objects had grown to 103 objects. On several occasions between 1921 and 1966, astronomers and historians discovered evidence of another seven objects that were observed either by Messier or by Méchain, shortly after the final version was published. These seven objects, M104 through M110, are accepted by astronomers as being "official" Messier Objects.
The Messier designations from M1 to M110, are still used by professional and amateur astronomers today and their relative brightness makes them popular objects in the amateur astronomical community.
Here are some good Messier Objects to look out for:
- M42 - The Orion Nebula - can be seen with the naked eye, but even better with binoculars
- M31 - the Andromeda Galaxy- can only just be seen with the naked eye, but better with binoculars
- M45 - the Pleiades open star cluster - can be seen with the naked eye
- M13 - the Hercules Globular Cluster - needs a telescope
- M27 - the Dumbbell Nebula - needs a telescope
Saturday, 25 April 2020
Stacking Astro Shots
What is Stacking?
You may have seen me and others writing about stacking shots, so what's this stacking thing all about? Well, it's the process of taking multiple shots of the same subject such as a galaxy or nebula and combining them together in such as way that the camera 'noise' is reduced and the detail and colours are enhanced. There's no fakery here and nearly every good astro shot you've ever seen, including those from NASA and the Hubble Telescope, have been processed in similar ways. It's important to have a camera that can take RAW images, as these contain every bit of information that the sensor has captured, including unwanted noise. Images are really just sets of numerical data stored on a memory card and made to look like photos by the camera software. They contain values which represent the colour and brightness of each tiny pixel that makes up each image.
What is Noise?
All digital cameras generate noise which shows up as random coloured dots on the screen or photo. Generally you don't see this noise in normal photos, but at night or in dark situations it becomes a lot more evident. It's a bit like the 'snow' effect you get when watching a TV channel with no signal. The noise is generated by the camera's sensor and it's dependent on the temperature and the lighting conditions. Each photo you take at night has a slightly different noise pattern on it and this needs to be removed - fortunately it can be to a large extent.
What Are Calibration Frames?
Calibration frames are extra shots you take to improve the final image. There are three main types:
I'll be adding a little more detail on these later. There are other types of calibration frames too, but in my experience they are less commonly used. The main shots you take of the subject are known as Lights or Subs.
It's usual to take as many calibration frames as time permits, but a minimum of 20 of each is usually recommended by most people. Some cameras can also process shots in-camera to avoid the need for Darks and Flats.
How Do You Stack Shots?
Stacking can be done manually in certain image processing programs like Adobe Photoshop and GIMP, but most people use a program that partially automates the process. Perhaps the two most popular ones (because they're free and good) are called Deep Sky Stacker (DSS) and AutoStakkert3 (AS!3) bling with PIPP which prepares a video to be stacked as separate frames. There are other dedicated astrophotography programs such as PixInsight, MaximXL and Astro Pixel Processer but these can be quite expensive. I'm currently investigating a similar free program call SiriL.
With these programs you load in your shots (Subs or Lights), add any calibration frames you have if desired (Darks, Bias and Flats) and DSS will stack them together to produce a single image which contains a lot less noise and more detail than any one of the single shots. Before starting the process there are many settings than can be altered which you need to learn about to improve the final image, but the default settings will do when you are starting out.
What is Image Processing?
Stacking isn't the end of the process and the next bit is probably the hardest. The image produced by stacking usually needs to be processed in image processing software such as GIMP, Affinity, PaintShopPro or Photoshop. These packages range from being completely free to fairly cheap and affordable and on to being pretty expensive, although you can sometimes pay monthly for them.
The stacked image is loaded into some image processing software and various techniques are used to bring out the details stored in the file. There's a lot more than you can actually see and it's amazing to watch it appear as you process the file. The main aspects of the software that need to be mastered are:
Image processing is a very complex subject about which I am still learning. I'm probably only on the first rung of the tall ladder and so I'm not going to attempt any detailed explanations here. Instead, I will provide links to the YouTube tutorials I use to learn about the subject and they will appear here shortly. Or. if you can't wait, just go to YouTube and search for 'Astrophotography Tutorials' - that's what I did.
You may have seen me and others writing about stacking shots, so what's this stacking thing all about? Well, it's the process of taking multiple shots of the same subject such as a galaxy or nebula and combining them together in such as way that the camera 'noise' is reduced and the detail and colours are enhanced. There's no fakery here and nearly every good astro shot you've ever seen, including those from NASA and the Hubble Telescope, have been processed in similar ways. It's important to have a camera that can take RAW images, as these contain every bit of information that the sensor has captured, including unwanted noise. Images are really just sets of numerical data stored on a memory card and made to look like photos by the camera software. They contain values which represent the colour and brightness of each tiny pixel that makes up each image.
What is Noise?
All digital cameras generate noise which shows up as random coloured dots on the screen or photo. Generally you don't see this noise in normal photos, but at night or in dark situations it becomes a lot more evident. It's a bit like the 'snow' effect you get when watching a TV channel with no signal. The noise is generated by the camera's sensor and it's dependent on the temperature and the lighting conditions. Each photo you take at night has a slightly different noise pattern on it and this needs to be removed - fortunately it can be to a large extent.
What Are Calibration Frames?
Calibration frames are extra shots you take to improve the final image. There are three main types:
- Darks - a set of shots taken at the same time as your target but with the lens covered
- Bias Frames - a set of shots taken at the highest shutter speed your camera can manage
- Flats - a set of shots taken with the lens pointed at an evenly lit bright subject
I'll be adding a little more detail on these later. There are other types of calibration frames too, but in my experience they are less commonly used. The main shots you take of the subject are known as Lights or Subs.
It's usual to take as many calibration frames as time permits, but a minimum of 20 of each is usually recommended by most people. Some cameras can also process shots in-camera to avoid the need for Darks and Flats.
How Do You Stack Shots?
Stacking can be done manually in certain image processing programs like Adobe Photoshop and GIMP, but most people use a program that partially automates the process. Perhaps the two most popular ones (because they're free and good) are called Deep Sky Stacker (DSS) and AutoStakkert3 (AS!3) bling with PIPP which prepares a video to be stacked as separate frames. There are other dedicated astrophotography programs such as PixInsight, MaximXL and Astro Pixel Processer but these can be quite expensive. I'm currently investigating a similar free program call SiriL.
With these programs you load in your shots (Subs or Lights), add any calibration frames you have if desired (Darks, Bias and Flats) and DSS will stack them together to produce a single image which contains a lot less noise and more detail than any one of the single shots. Before starting the process there are many settings than can be altered which you need to learn about to improve the final image, but the default settings will do when you are starting out.
What is Image Processing?
Stacking isn't the end of the process and the next bit is probably the hardest. The image produced by stacking usually needs to be processed in image processing software such as GIMP, Affinity, PaintShopPro or Photoshop. These packages range from being completely free to fairly cheap and affordable and on to being pretty expensive, although you can sometimes pay monthly for them.
The stacked image is loaded into some image processing software and various techniques are used to bring out the details stored in the file. There's a lot more than you can actually see and it's amazing to watch it appear as you process the file. The main aspects of the software that need to be mastered are:
- Layers
- Levels
- Curves
- Masks
- Blending Modes
- Filters
- Noise Reduction
Image processing is a very complex subject about which I am still learning. I'm probably only on the first rung of the tall ladder and so I'm not going to attempt any detailed explanations here. Instead, I will provide links to the YouTube tutorials I use to learn about the subject and they will appear here shortly. Or. if you can't wait, just go to YouTube and search for 'Astrophotography Tutorials' - that's what I did.
Thursday, 23 April 2020
Getting Started With Astronomy
I've had a lot of questions about getting started with astronomy and many people asking me about which telescope I can recommend. Well, although I do have a telescope, I'm not currently using it much and I prefer to use just my long camera lenses instead. So, with that in mind, I can't really (and wouldn't want to) recommend a telescope to anyone, particularly as so many are bought and end up gathering dust when people lose interest.
What I can recommend is starting out with a decent pair of binoculars and an astronomy book. Binoculars give you a wide field of view making it easier to pick out constellations and stars and some planets. For some constellations like the Big Dipper (Plough) and Orion you don't even need binoculars. A phone free phone app like Sky Walk 2 will also help you identify what you're looking at by holding your phone up to the sky - they're quite amazing really.
If you feel you want to take it further then consider visiting a stargazing night at a local astronomy club. Near to us in Leigh there's one in Bolton and one not too far away in Manchester at Heaton Park - both have websites or Facebook pages to see the they meet. Here you can try out telescopes and ask questions to find out what might be best for you.
Finally, there are many excellent sources of information on the internet, including YouTube tutorial videos and web forums like the StarGazers Lounge. Just search for astronomy, astrophotography or something similar.
What I can recommend is starting out with a decent pair of binoculars and an astronomy book. Binoculars give you a wide field of view making it easier to pick out constellations and stars and some planets. For some constellations like the Big Dipper (Plough) and Orion you don't even need binoculars. A phone free phone app like Sky Walk 2 will also help you identify what you're looking at by holding your phone up to the sky - they're quite amazing really.
If you feel you want to take it further then consider visiting a stargazing night at a local astronomy club. Near to us in Leigh there's one in Bolton and one not too far away in Manchester at Heaton Park - both have websites or Facebook pages to see the they meet. Here you can try out telescopes and ask questions to find out what might be best for you.
Finally, there are many excellent sources of information on the internet, including YouTube tutorial videos and web forums like the StarGazers Lounge. Just search for astronomy, astrophotography or something similar.
Subscribe to:
Posts (Atom)