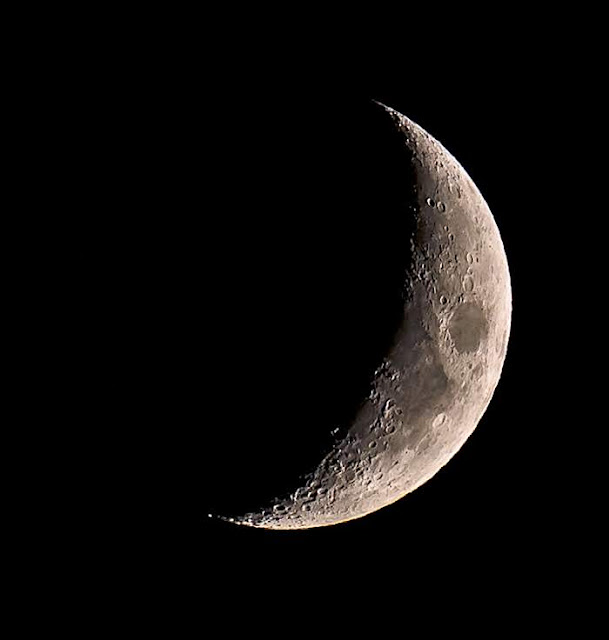
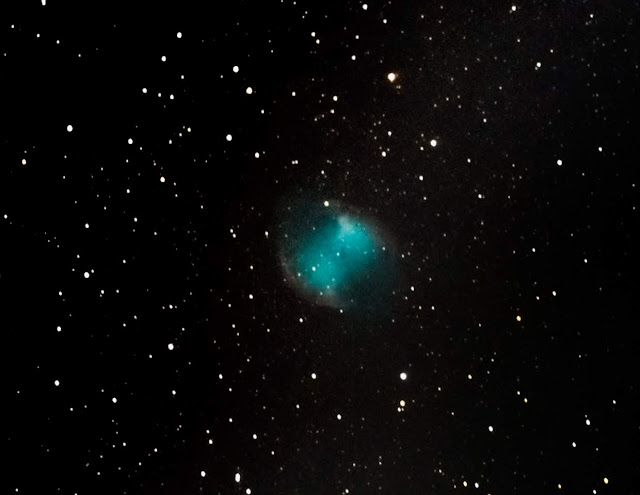
Wednesday 29 April 2020

Tonight's Moon - 29/4/20

Tonight's single shot of the moon (29/4/20). I've decided that most of my previous moonshots have been taken using the wrong white balance. I can reprocess them to correct this, but I don't think I'll bother - there'll be plenty more moons in the sky!


Venus is a lot harder to photograph my camera gear.  It's very bright, very small and a long way away. Here's the best I can currently do. At least, being a crescent shape, it shows it has phases like the moon.  Only Mercury, Venus and the Moon show full phases like this, because they are between the Earth and the Sun.  Mars shows some partial phases I believe.


Getting Started With StarGazing

If you want to get started in StarGazing I'd recommend getting a pair of binoculars and a book such as the one in the Amazon link below. I'd say that you need to pay at least £50-£60 for a decent pair of binoculars as cheap ones often disappoint and may not be aligned correctly. Good budget brands include Opticron, Celestron, Hawke and Helios as well as the range supplied by the RSPB bird society which I think may be rebranded Viking products.

I'm not making any recommendations except to say have a look at the websites shown below and consider visiting Focal Point Optics in Cheshire who will let you try out various models, give you great advice and not put you under any pressure to buy.

MoonShot Collection

I just can't resist taking photographs of the Moon, even though I've got loads of shots already. There's just something about that big, bright object shining up in the night sky. However, the full moon doesn't make the best shots because the light is very flat. The craters and ridges need a bit of shadow to make them stand out and so partial phases usually produce the best photos.

All these photographs and video were taken from Tyldesley in Greater Manchester between October 2019 and April 2020.


Monday 27 April 2020

Stellarium - Free Planetarium Sofware

Stellarium is an amazing free planetarium program which shows the sky realistically in 3D, just as you'd see it with the naked eye, binoculars or a telescope. It is completely free of charge as a download from www.Stellarium.org


But Stellarium also contains a wealth of information about most things in the night sky. It names all the planets, constellations, galaxies and nebulae and shows you where they are in the sky on any given night. Many people use it to look at what can be seen from their location before they go out looking. You can also animate the stars both backwards and forwards in time to check out something you saw previously or to plan what you might see in the future
.
Don't be put off by it's complexity, you don't need to know much to be able to get some good use out of it. Start by putting in your location and the correct time and date. Use the mouse and arrow keys to move the sky around until it's pointing the way you are looking. The two menus are in the bottom left corner of the screen but to see them you need to move the mouse pointer over there and then they will appear. The one on the left side lets you set things up and search for something and the one on the bottom edge turn things on and off such as constellation lines, star and planet names etc.

Try it, it's completely free and although it takes a little getting used to, it's well worth the effort. There is also a simpler mobile phone app version too. 


Sunday 26 April 2020

DSLR Camera Settings for Astrophotography

Currently I only use a DSLR (Digital Single Lens Reflex) camera for astrophotography.  There are other more specialist cameras that can be used, but these require a computer to control them and view their images. You can also use compact and bridge cameras as well as mobile 'phone cameras up to a point, but as I have no experience of any of these I cannot say anything about them.  There are however, many websites, Facebook groups and forums specifically aimed at these other types of camera.

I'm also currently only using my camera lenses rather than a telescope to take astro shots, although I do have a telescope and intend to at least try it at sometime in the future.  So this post is only about the camera settings which I use to get my shots with my prime and zoom lenses plus teleconverters.

The first thing to do is to make sure that the camera is set to take RAW images, rather than JPGs.  RAW images store all the data captured by the camera's sensor, whereas JPGs lose some of it by compressing the image to make it smaller in file size (not image size). JPGs are mainly used to put photos on the internet or to share shots by email and social media, where file size usually matters more than quality.  Some basic cameras and mobile phones only take JPG images.

The next thing is that your camera should be in fully manual mode.  If your camera doesn't have a manual mode, you may have a 'night sky' setting that you can try.  Manual mode means that you control the shutter speed, the aperture and the ISO rather than the camera. You should also turn off any vibration reduction technology your camera or lens has, such as VR or IS.

The camera always needs to be on a tripod or tracking mount and it's best to use an intervalometer, a remote shutter cable or at least some kind of exposure delay or self timer to avoid wobbling the camera by pressing the shutter button. The slightest movement will cause blur.

You need to learn how to use your camera and focus in the dark, so it's good to practice changing settings in the light! Your camera's LiveView screen should be turned on so that you can see the live image on the back of your camera rather than having to use the viewfinder which is very difficult in the dark. Zoom in to a star in LiveView and slowly roll the focus ring on the lens back and forth until the star eventually appears as just a small bright dot.  It doesn't have to be the star you're shooting at as the focus will be pretty much the same for any distant object.

Exposure settings are largely a matter of trial and error as what what works for one person in one situation doesn't work somewhere else.  However it is good to have some starting values to aim at. I mainly use the following ranges of settings, but I do also experiment with others from time to time. Please remember these are my settings for my camera and lenses - yours may be quite different.

Untracked and Unstacked Wide Shots - Constellations and the Milky Way
  • Lens: 14-24mm zoom and 24-70mm zoom
  • ISO range: 1600-3200 : Aperture range: f/2.8-f/4 : Shutter speed: 10-30 seconds
  • Number of shots: 1
Tracked and Stacked Deep Sky Objects - Galaxies and Nebulae
  • Lens: 500mm with 1.4x, 1.7x or 2x teleconverters
  • ISO range: 800-1600 : Aperture range: f/8-f/11 : Shutter speed: 30, 60 or 90 seconds
  • Number of shots: 20-30
Single shots of the Moon
  • Lens: 500mm with 1.4x, 1.7x or 2x teleconverters
  • ISO range: 100-200 : Aperture range: f8-f11 : Shutter speed: 1/80th -1/200th second
  • Number of shots: 1
As I mentioned above, experimentation with these exposure ranges is vital because conditions vary each night. Always do some test shots and have a look at what you're getting, making the necessary adjustments after each shot before starting a long sequence of exposures.

There is no magic wand, you just have to get out there and try it.  Don't be disappointed if your first few nights produce nothing or little worth keeping, mine certainly did.  Perseverance is key - don't give up.

Messier Objects and Numbers

So Who Was Charles Messier?

Charles Messier was a French astronomer who lived 1730-1817. He published an astronomical catalogue consisting of 110 galaxies, nebulae and faint star clusters, which came to be known as the Messier Objects. The purpose of the catalogue was to help astronomical observers distinguish between permanent and transient objects in the sky.

Messier's occupation as a comet hunter led him to continually come across fixed diffuse objects in the night sky which could be mistaken for comets. He compiled a list of them in collaboration with his friend and assistant Pierre MĂ©chain (who may have found at least 20 of the objects), to avoid wasting time sorting them out from the comets they were looking for. The entries are now known to be 39 galaxies, 4 planetary nebulae, 7 other types of nebulae, and 55 star clusters.

Messier did his observing with a 100 mm (four-inch) refracting telescope from HĂŽtel de Cluny (now the MusĂ©e national du Moyen Âge), in Paris. The list he compiled only contains objects found in the area of the sky Messier could observe, from the north celestial pole to a declination of about −35.7° .

They are not organized scientifically by object type, or by location. The first version of Messier's catalogue contained 45 objects and was published in 1774 in the journal of the French Academy of Sciences in Paris. In addition to his own discoveries, this version included objects previously observed by other astronomers, with only 17 of the 45 objects being Messier's. By 1780 the catalog had increased to 80 objects.

The final version of the catalogue was published in 1781, in the 1784 issue of Connaissance des Temps. The final list of Messier objects had grown to 103 objects. On several occasions between 1921 and 1966, astronomers and historians discovered evidence of another seven objects that were observed either by Messier or by MĂ©chain, shortly after the final version was published. These seven objects, M104 through M110, are accepted by astronomers as being "official" Messier Objects.

The Messier designations from M1 to M110, are still used by professional and amateur astronomers today and their relative brightness makes them popular objects in the amateur astronomical community.

Here are some good Messier Objects to look out for:
  • M42 - The Orion Nebula - can be seen with the naked eye, but even better with binoculars
  • M31 - the Andromeda Galaxy- can only just be seen with the naked eye, but better with binoculars
  • M45 - the Pleiades open star cluster - can be seen with the naked eye
  • M13 - the Hercules Globular Cluster - needs a telescope
  • M27 - the Dumbbell Nebula - needs a telescope

Saturday 25 April 2020

Stacking Astro Shots

What is Stacking?

You may have seen me and others writing about stacking shots, so what's this stacking thing all about? Well, it's the process of taking multiple shots of the same subject such as a galaxy or nebula and combining them together in such as way that the camera 'noise' is reduced and the detail and colours are enhanced.  There's no fakery here and nearly every good astro shot you've ever seen, including those from NASA and the Hubble Telescope, have been processed in similar ways. It's important to have a camera that can take RAW images, as these contain every bit of information that the sensor has captured, including unwanted noise. Images are really just sets of numerical data stored on a memory card and made to look like photos by the camera software. They contain values which represent the colour and brightness of each tiny pixel that makes up each image.

What is Noise?

All digital cameras generate noise which shows up as random coloured dots on the screen or photo. Generally you don't see this noise in normal photos, but at night or in dark situations it becomes a lot more evident.  It's a bit like the 'snow' effect you get when watching a TV channel with no signal. The noise is generated by the camera's sensor and it's dependent on the temperature and the lighting conditions. Each photo you take at night has a slightly different noise pattern on it and this needs to be removed - fortunately it can be to a large extent.

What Are Calibration Frames?

Calibration frames are extra shots you take to improve the final image. There are three main types:

  • Darks - a set of shots taken at the same time as your target but with the lens covered
  • Bias Frames - a set of shots taken at the highest shutter speed your camera can manage
  • Flats - a set of shots taken with the lens pointed at an evenly lit bright subject

I'll be adding a little more detail on these later. There are other types of calibration frames too, but in my experience they are less commonly used.  The main shots you take of the subject are known as Lights or Subs.

It's usual to take as many calibration frames as time permits, but a minimum of 20 of each is usually recommended by most people.  Some cameras can also process shots in-camera to avoid the need for Darks and Flats.

How Do You Stack Shots?

Stacking can be done manually in certain image processing programs like Adobe Photoshop and GIMP, but most people use a program that partially automates the process.  Perhaps the two most popular ones (because they're free and good) are called Deep Sky Stacker (DSS) and AutoStakkert3 (AS!3) bling with PIPP which prepares a video to be stacked as separate frames.  There are other dedicated astrophotography programs such as PixInsight, MaximXL and Astro Pixel Processer but these can be quite expensive.  I'm currently investigating a similar free program call SiriL.

With these programs you load in your shots (Subs or Lights), add any calibration frames you have if desired (Darks, Bias and Flats) and DSS will stack them together to produce a single image which contains a lot less noise and more detail than any one of the single shots. Before starting the process there are many settings than can be altered which you need to learn about to improve the final image, but the default settings will do when you are starting out.

What is Image Processing?

Stacking isn't the end of the process and the next bit is probably the hardest.  The image produced by stacking usually needs to be processed in image processing software such as GIMP, Affinity, PaintShopPro or Photoshop. These packages range from being completely free to fairly cheap and affordable and on to being pretty expensive, although you can sometimes pay monthly for them.

The stacked image is loaded into some image processing software and various techniques are used to bring out the details stored in the file.  There's a lot more than you can actually see and it's amazing to watch it appear as you process the file.  The main aspects of the software that need to be mastered are:

  • Layers
  • Levels
  • Curves
  • Masks
  • Blending Modes
  • Filters
  • Noise Reduction

Image processing is a very complex subject about which I am still learning.  I'm probably only on the first rung of the tall ladder and so I'm not going to attempt any detailed explanations here.  Instead, I will provide links to the YouTube tutorials I use to learn about the subject and they will appear here shortly. Or. if you can't wait, just go to YouTube and search for 'Astrophotography Tutorials' - that's what I did.

Thursday 23 April 2020

Getting Started With Astronomy

I've had a lot of questions about getting started with astronomy and many people asking me about which telescope I can recommend. Well, although I do have a telescope, I'm not currently using it much and I prefer to use just my long camera lenses instead. So, with that in mind, I can't really (and wouldn't want to) recommend a telescope to anyone, particularly as so many are bought and end up gathering dust when people lose interest.

What I can recommend is starting out with a decent pair of binoculars and an astronomy book. Binoculars give you a wide field of view making it easier to pick out constellations and stars and some planets. For some constellations like the Big Dipper (Plough) and Orion you don't even need binoculars. A phone free phone app like Sky Walk 2 will also help you identify what you're looking at by holding your phone up to the sky - they're quite amazing really.

If you feel you want to take it further then consider visiting a stargazing night at a local astronomy club. Near to us in Leigh there's one in Bolton and one not too far away in Manchester at Heaton Park - both have websites or Facebook pages to see the they meet. Here you can try out telescopes and ask questions to find out what might be best for you.

Finally, there are many excellent sources of information on the internet, including YouTube tutorial videos and web forums like the StarGazers Lounge. Just search for astronomy, astrophotography or something similar.

My Astrophotography Equipment

Over the last couple of days I've been asked many times on various Facebook posts what equipment I use to take my photographs.  As I can't possibly answer everybody individually,  I've decided to do a post on it here. I hope I missed nothing out, but if I have I'll update it as necessary.


Hardware
  • Nikon D500 crop sensor camera for shots of the moon, planets, galaxies and nebulae
  • Nikon D810 full frame camera for widefield shots of stars and constellations
  • Nikon 500mm f/4E FL lens for the moon, planets, galaxies and nebulae
  • Nikon TC-20E II 2x teleconverter for magnification where necessary
  • Nikon TC-14E III 1.4x teleconverter  for magnification where necessary
  • Nikon intervalometer for taking sequences of shots
  • SkyWatcher HEQ5 Pro GOTO mount with SynScan controller and tripod for tracking the stars
  • Neewer right-angled viewed for polar alignment
  • Bahtinov mask to aid focusing on stars
  • SkyWatcher 12v 17Ah battery power pack to power the mount
  • Red headlight to see in the dark without losing night vision
  • Compass to align the tripod north
  • Spirit level to level the tripod
  • Laptop computer for processing and uploading to Facebook


Software
  • Deep Sky Stacker (free) to stack shots together
  • Adobe PhotoShop Elements 14 (paid, cheapish) to process the stacked shots and bring out detail
  • Adobe PhotoShop CC (paid, expensive) to process the stacked shots and bring out detail

Sustenance on cold nights
  • Lots of cups of tea
  • A packet of biscuits or crisps
  • The occasional single malt whisky

Set up procedure
  • Level the tripod and point it north
  • Attach the mount and counterbalance weights
  • Attach the camera and balance in two axes on the mount
  • Polar align the mount (make it point at Polaris, the north star)
  • Setup SynScan controller with time, date, location coordinates etc
  • Use Syncs to do a 'Two Star' align - move the mount to two known stars to calibrate it

Finding a target and taking shots (quick version)
  • Select a target using the SynScan controller
  • Move the mount to the target's position
  • Put the camera in manual mode and chose the aperture and ISO
  • Take a test shot to see if the target is centred in the frame
  • Check the focus using the Bahtinov mask
  • Use the hand controller to adjust the mount position if necessary
  • Set the exposure time and number of shots, e.g. 30 shots (known as subframes or subs)
  • Start the sequence of shots - usually at least 20 and as many as 50
  • Go inside and have a cup of tea

Processing and Sharing
  • Copy the finished subs off the camera and onto the laptop computer
  • Stack the shots using Deep Sky Stacker
  • Process the final stacked shot to bring out the fine detail and colours
  • Upload the finished shot to Facebook or a similar internet site
  • Wait to see the response

I will add some posts shortly outlining the following processing techniques:
  • Stacking for increasing the detail and reducing image noise
  • Taking darks, flats and bias frames for noise reduction and better detail
  • Image processing

Hope that helps

Thursday 16 April 2020

My Third All-Nighter

Here are some shots from my third All-Nighter this month where I stay up until the wonderful Dawn Chorus of birds start singing in order to view Jupiter, Saturn, Mars and the Moon rising in the south east.  But before that happens I spent the night taking shots of Deep Sky Objects.

M81 and M82 - Bodes Galaxy and the Cigar Galaxy

M27 - The Dumbbell Nebula
Can you see anything?
Right to Left - Jupiter, Saturn, Mars and the Moon does below.
Jupiter showing some very faint cloud bands
Saturn - nice to see the separation between the planet and it's rings
Mars - well at least it's a bit reddish!
The waning crescent moon

Sunday 12 April 2020

Waning Gibbous Moon - 12/4/20


A single frame handheld shot of the waning gibbous moon at 2am this morning as seen from Tyldesley in Greater Manchester. Taken with a Nikon D500, Nikon 500mm f/4 lens and a Nikon 2x teleconverter.

Sunday 5 April 2020

Venus and the Pleiades

Venus and the Pleiades - sounds like the name of a pop group doesn't it? Well this was going to be one of the highlights in the night sky this month and so I was very keen to photograph it.

Frustratingly, the clouds rolled in on best night when Venus would be in front of this open star cluster (3/4/20), so I had to make do with the following night (4/4/20).


I started by taking some photos of the waxing gibbous moon before it went completely dark. There are nice views of the Tycho and Copernicus lunar impact craters here. It was from this photo that I realised how far the ejection debris was flung from Tycho after it was hit by a large meteorite.


Venus was my next target, also before it went fully dark. I wanted to try to show its phase as it is rapidly diminishing in size and look very crescent-like. I had to turn the brightness down a long way to show it and this has made the sky look darker than it actually was.


Here's Venus with the Pleiades star cluster to the lower right.  Whoever named this asterism the 'Seven Sisters' clearly couldn't see all the stars - there are many more than seven!  Here's a quote shamelessly lifted from a post by Paul Richardson.
Every eight years or so, Venus passes across the line of sight of the Pleiades star cluster. It's not exactly passing "through" the star cluster, since the Pleiades are about 88 thousand times further away from us than Venus is. Since Venus is at present about 107 million Km away, that make the Pleiades a long way from home. Anyway this is how they looked last night. So mind boggling, but so beautiful.

Thursday 2 April 2020

L.A.S. Inaugural Meeting in Bowland


The Leigh Astro Society (L.A.S.) had its inaugural meeting in the Forest of Bowland in Lancashire on the 1st October 2019.  This trip to our nearest 'Dark Sky' location had its seeds in a casual discussion with two birding friends (George Pike and Paul Richardson) from Leigh Ornithological Society (L.O.S.) when I discovered that George had always wanted to see Andromeda and that Paul had beed an astronomer since his early youth. As Paul had an old telescope lurking in the back of his wardrobe, I decided to arrange a trip and on that night the L.A.S. was born. The founding members are Paul, George and myself with Paul being duly elected as Chairman of the Society because he has telescopes and knows stuff.

The actual idea to form a 'Society' all started off as a bit of a joke whilst we were out there, with me making up the initials to be the same as our esteemed birding Society. We'd recently been given a talk by one of the L.O.S.'s founding members who explained how the Society started nearly 50 or more years ago.  So in a comedy parody of that talk I started saying ...
"It was in the winter of 2019 when three intrepid lads forayed into deepest and darkest Lancashire in search of Andromeda that the foundations of the L.A.S. were laid"
I also made fun of the fact that in a recent radio interview with one our L.O.S. members, the presenter couldn't the Society's name right (well it is rather a mouthful) and so some sarcastic suggestions included the Leigh Astrophenomical Society and the Leigh Astronomological Society before we eventually settled on something short and sweet - the Leigh Astro Society.

Anyway, it was on that night that George and I had our first views of Andromeda and Saturn thanks to Paul's help.  We were based in a small lay-by along the BXXX out of Waddington and it was pretty dark - there was just a distant glow from Preston to the west. But we could see so many stars compared to our suburban homes in Leigh and Tyldesley, Greater Manchester.

These photos are not much, but they mark my initial steps into the field of Astrophotography. Some would say it's a minefield, others a wonderful hobby. I've already experienced both!

Work in progress - ignore the notes below.


Notes ....

George Pike, Paul and I had a great night viewing the skies above Bowland and this inspired me to look for a tracking mount so that I might do longer exposures of deep sky objects (DSO's) such as galaxies and nebulae as well as the Milky Way.

We had a great night and George (Pike) got to see Andromeda (one of his long-felt needs) and I reawakened my interest in the starts all under the superb guidance of our resident astronomy guru Dr. Paul Richardson. We also saw Saturn, the Hyades and Pleiades and a host of other stars which just can't be seen from suburban areas.

Update:
I've since set up a light-hearted, fun Facebook group which all those with an interest in astronomy, the night sky and astrophotography are welcome to join. We also have a WhatsApp group for reporting interesting sightings, aurora alerts and anything else that's relevant.